For too long, managing physical security has felt like operating inside a "Black Box". You deploy your guards to a site, and immediately, your visibility drops to zero. You are left dealing with late arrivals, missing data from scattered paper logs, and a complete inability to react to on-site emergencies in real-time.
At OPSY, we designed our platform to shatter that black box. By utilizing a live data flow, every single action taken by a guard in the field triggers an immediate update on the administrator's dashboard. This synchronized ecosystem guarantees complete operational control.
If you are new to the platform (or just exploring our interactive demo), you might be wondering how quickly you can get operations up and running. The answer is: minutes.
Here is exactly how to launch, monitor, and complete your first fully digital fire watch shift using the OPSY ecosystem.
The Two Sides of OPSY
Before we begin, remember that the OPSY platform operates on two interconnected fronts:
- Administration (Web Dashboard): Your centralized command center for scheduling, monitoring, and generating reports.
- Field Operations (Mobile App): The intuitive mobile client your guards use to clock in, execute patrols, and log incidents.
Step 1: Create Your Location
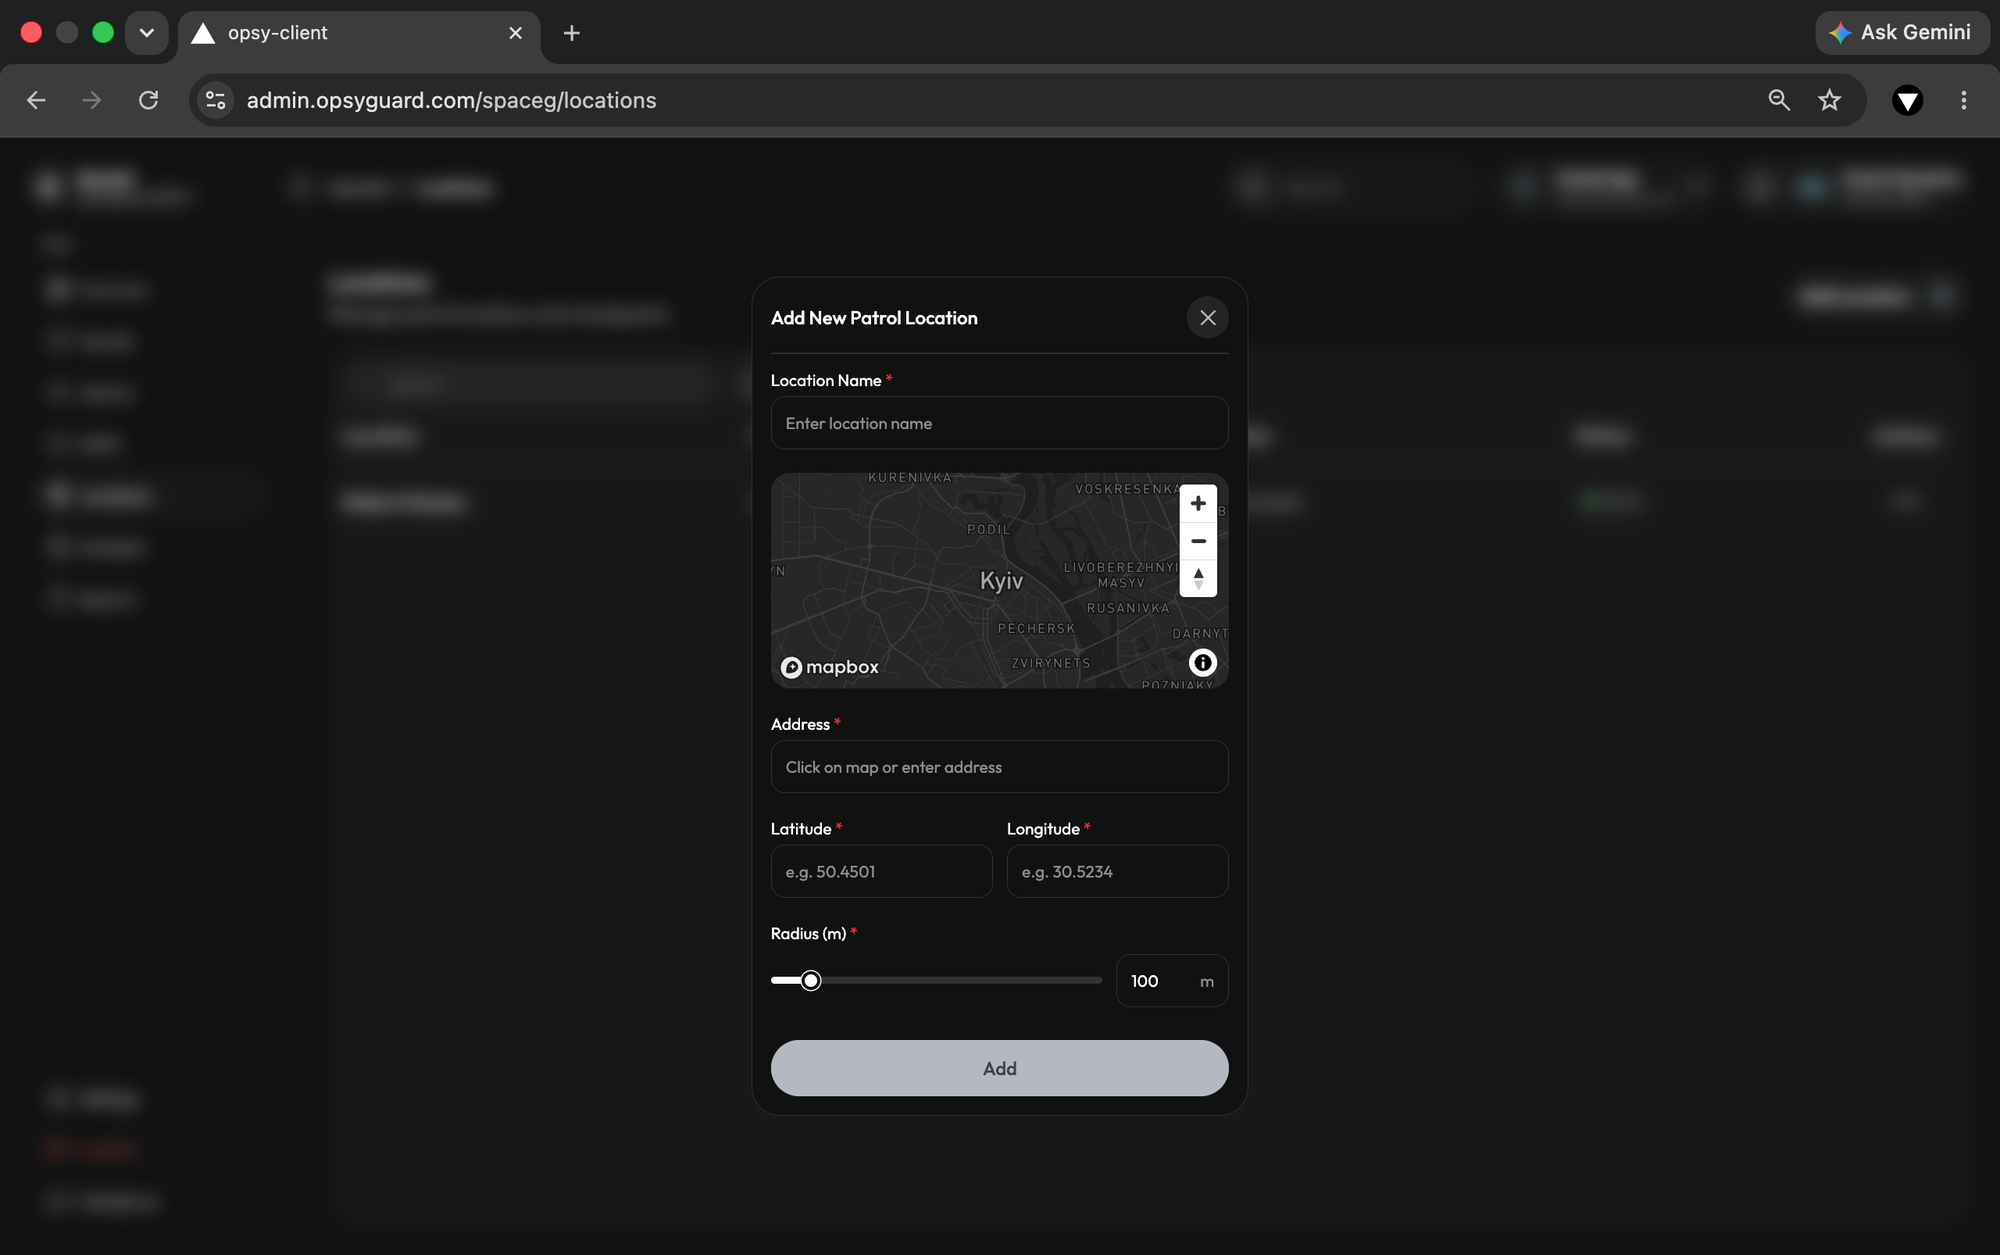
Every security operation starts with a site. In the Admin Panel, navigate to the Locations module. Here, you will define the exact perimeter of the site your team is protecting. This establishes the geographic boundaries and the specific checkpoints your guards will need to monitor during their rounds.
Step 2: Assign Your Guards
Next, you need your personnel. Head over to the Guards section. If your team is already populated, simply select the personnel for the job. If you are onboarding a new hire or testing the system, you can easily send an invitation directly to their email. Once they download the OPSY Guard Client and log in, they are instantly synced to your dashboard.
Step 3: Schedule and Start the Shift
With your location and guards ready, it is time to build the schedule.
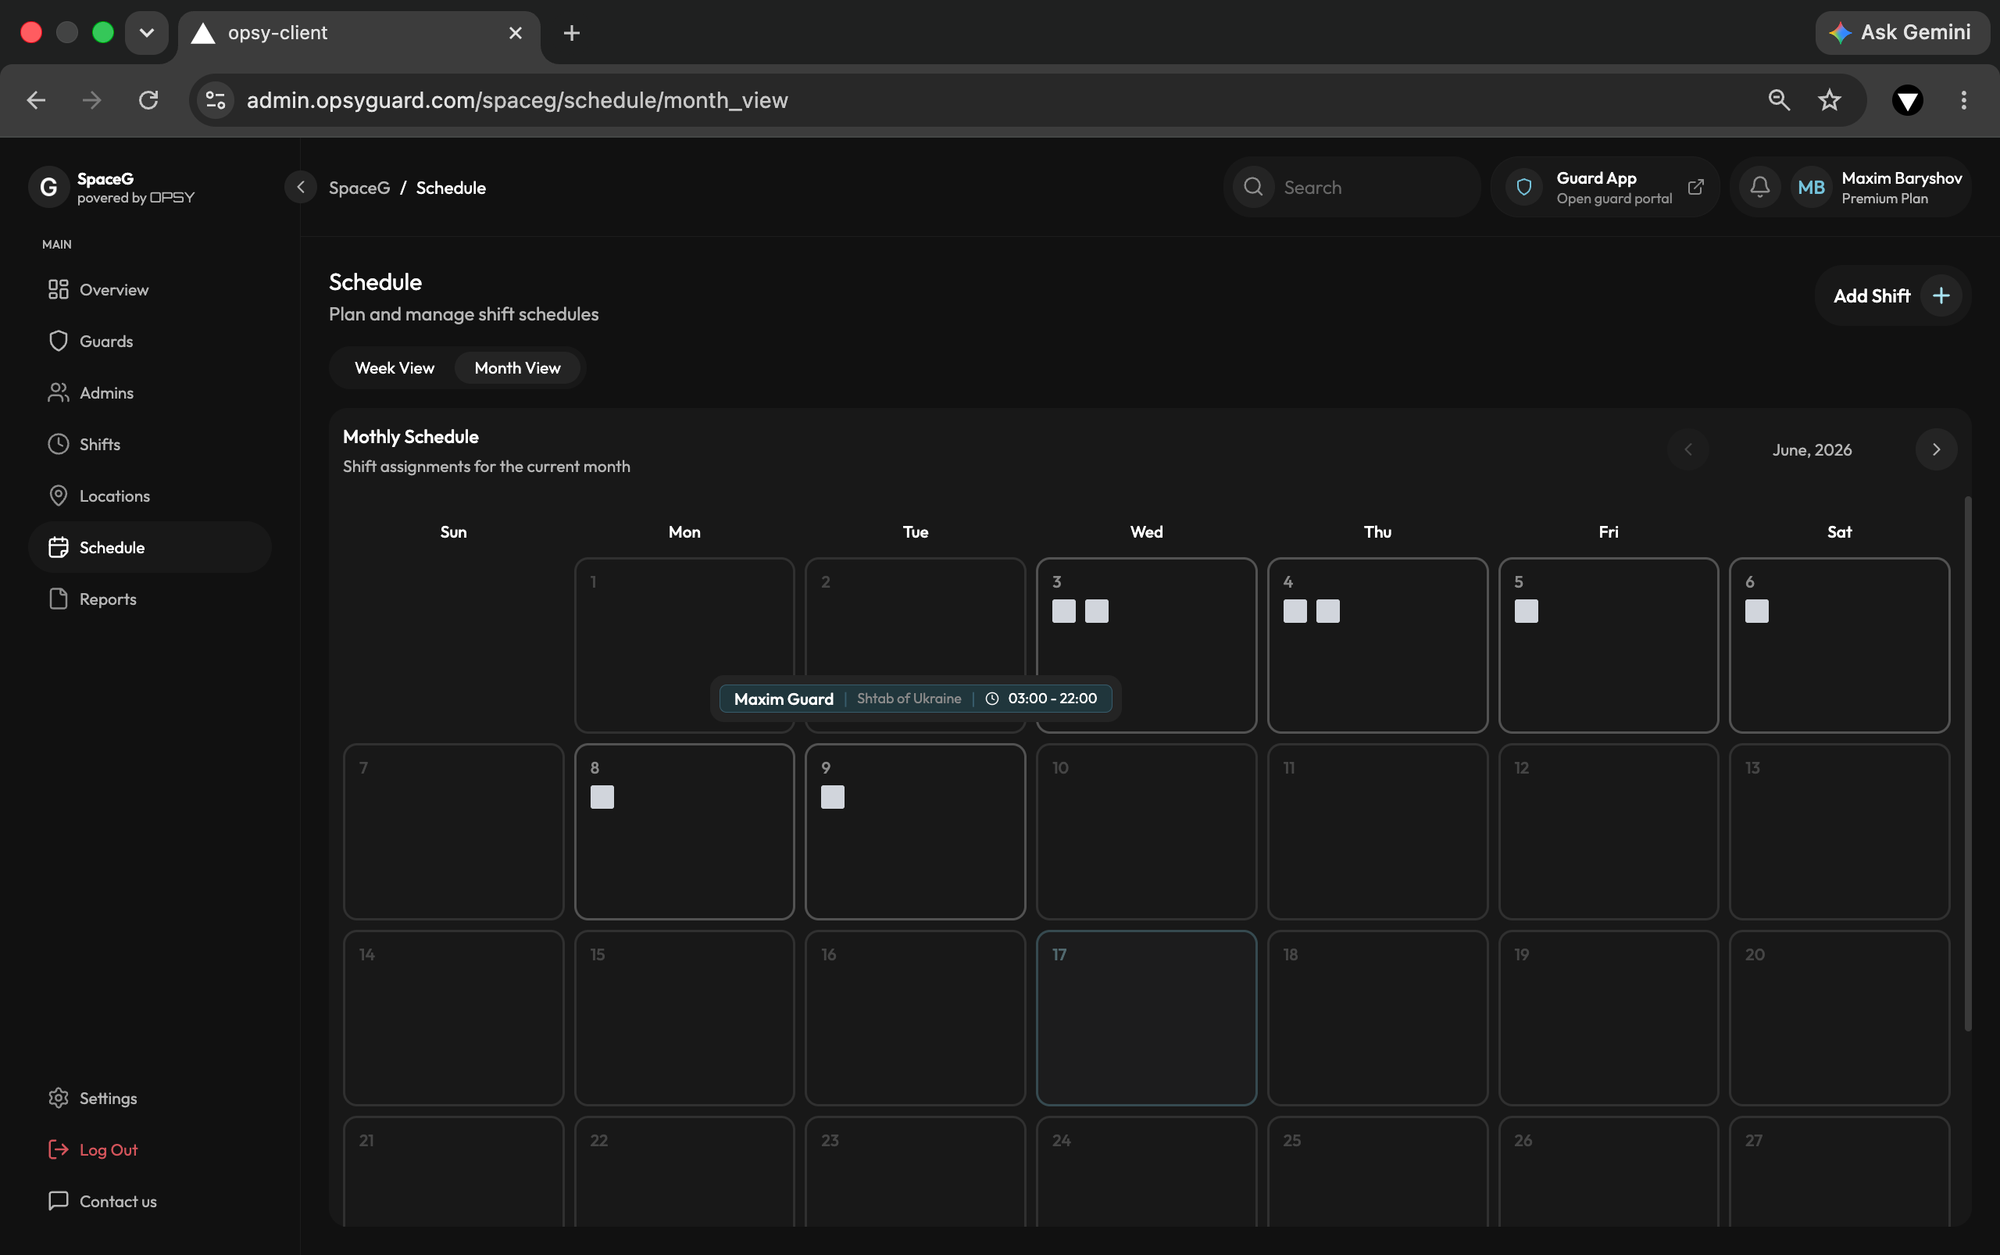
- The Admin Side: Use the manual scheduling module to logically plan and distribute shifts across your team. Assign a guard to a location and define the required patrol rounds.
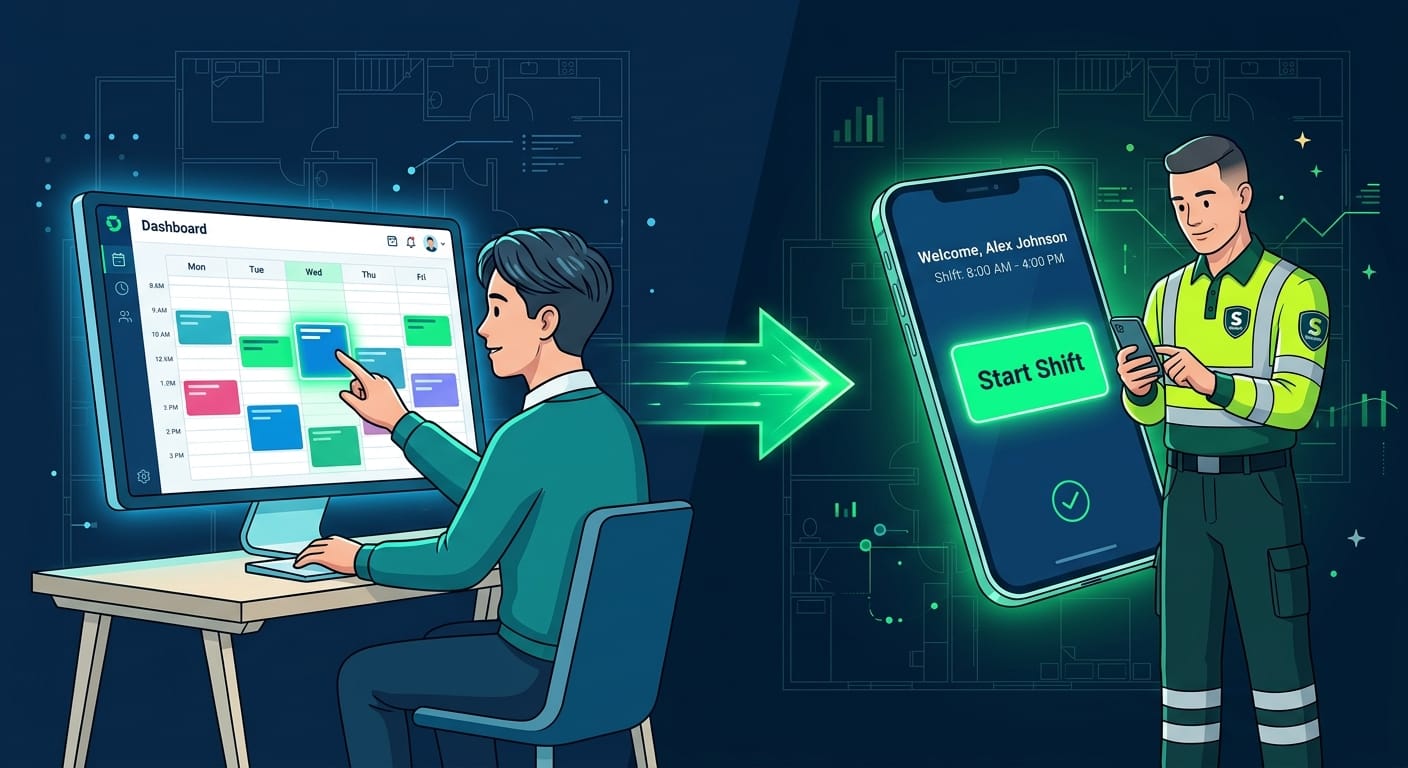
- The Client Side (The Guard): When the shift time approaches, the guard opens the mobile app. They will see their exact assignment. To begin, they simply hit the "Swipe to Start Shift" button.
- The Magic: The exact second they swipe, your dashboard updates their status to 'On Patrol' with exact timestamps. If the guard doesn't swipe in on time, a centralized 'Late Arrival Alert' fires immediately on your screen, allowing you to react instantly.
Step 4: Monitor Live Shift Activity
This is where traditional paper logs are completely rendered obsolete. As the shift progresses, you don't have to guess what your guard is doing.
- Live Tracking: As the guard executes their scheduled checkpoint rounds in real time, the Admin tracks live progress graphs, verifying active movement and strict schedule compliance.
- Incident Alerts: If a guard spots a hazard or unusual activity, they instantly log it via the mobile app with text notes. High-priority emergency alerts flash instantly on your dashboard, generating a draft incident report before the shift is even over.
Ready to see it in action? Log into your OPSY Admin panel today and take total operational control.
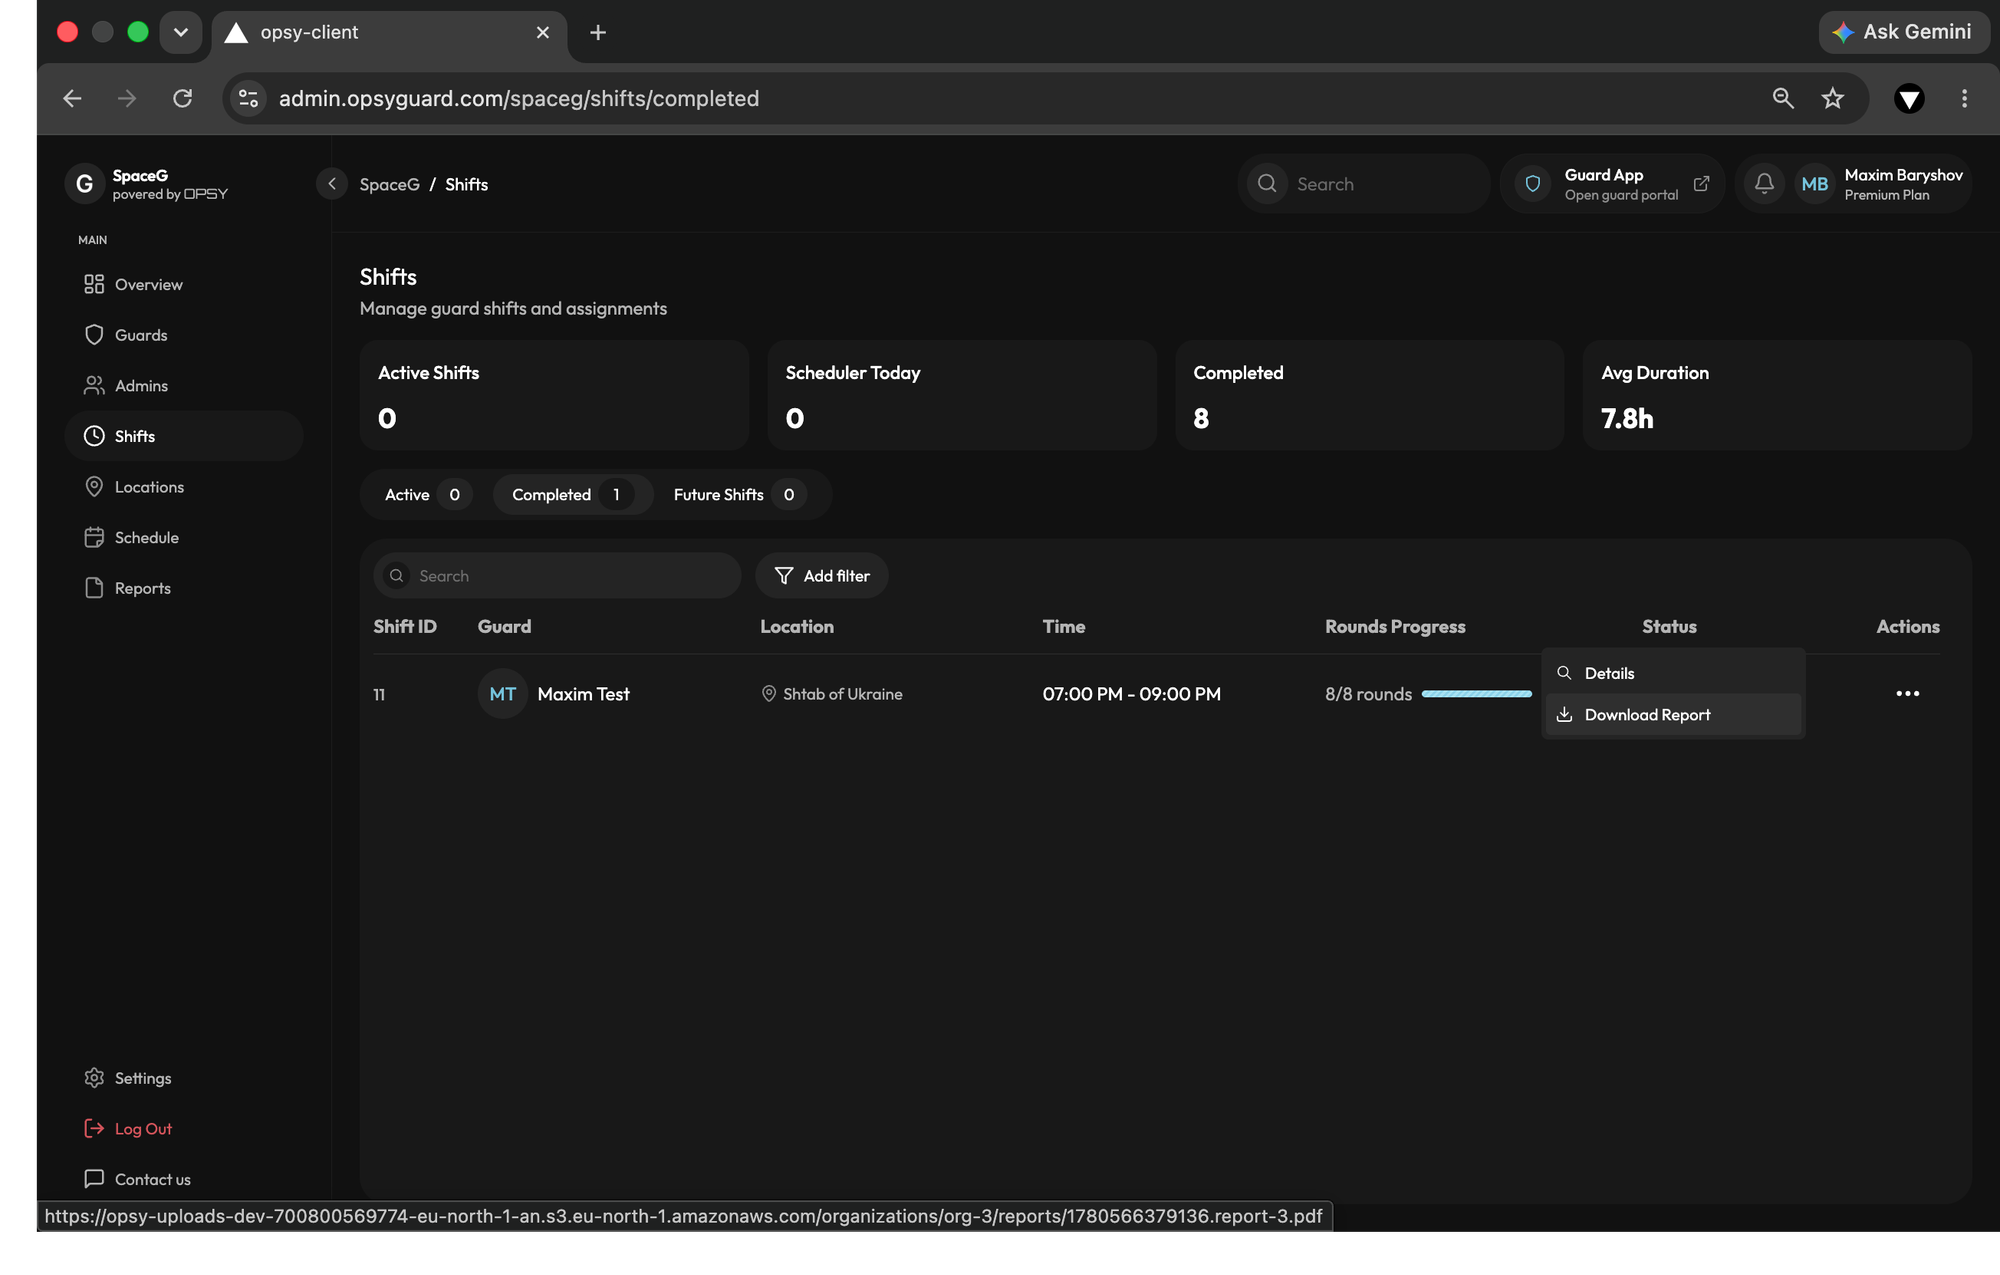
Step 5: Complete the Shift and Generate the Report
When the time is up, the guard finishes their final patrol and closes the shift on their mobile app.
- Digital Close: Before closing out, the app automatically compiles all patrol rounds, incidents, and precise GPS timestamps. The guard then provides a binding digital signature directly on their screen, confirming the accuracy of the log.
- Verified Proof of Service: Back on the Admin Panel, that raw field data is instantly transformed into clean, comprehensive, client-ready PDFs. With zero manual paperwork, you can generate an incident summary or a daily activity log that includes the legally binding embedded signatures.
Experience Immediate Transparency
By following these five steps, you eliminate blind spots and protect your assets. With digital signatures and GPS stamps, you build bulletproof client relationships because they never have to question the accuracy of your invoices.